Elastic Search
前言
为什么要写这篇,首先写这个的技术的肯定不止我一个,我将其视为我自己学习的一个路程,自己如果在工作中使用到了,也可以拿来直接上手。我认为在工作中,以最少知识原则去构建项目,当这些最少知识不足以满足需求的时候,就得学习。
Elastic Search 是什么
Elastic Search (以下简称ES),ES 是一个基于Lucene的搜索服务器。它提供了一个分布式多用户能力的全文搜索引擎,基于RESTful web接口,使用Java语言开发。
Lucene是Apache软件基金会Jakarta项目组的一个子项目,是一个开放源代码的全文检索引擎工具包,但它不是一个完整的全文检索引擎,而是一个全文检索引擎的架构。
为什么使用Elastic Search
相对于以前我们需要模糊查询一个字段通常直接访问数据库,使用like %%,才能做到。这样的查询很慢,而且数据量一单上来了以后,效率很低。
谁在使用
- 维基百科
Stack OverflowGithubAlibaba
等许多公司或平台都使用了ES,这么多公司都在用,足以证明这个产品的好。相同类型的产品也有一个叫Solr (读作Solar)也是一款搜索引擎。
Elastic Search 使用
安装
我们继续采用docker compose的方式来安装。实际上生产的时候可以考虑传统安装或者docker或者k8s的方式,具体看公司,生产不推荐本次docker compose的配置方式进行安装。编写docker-compose.yml
yaml
version: '3.1'
services:
  elasticsearch:
    image: daocloud.io/library/elasticsearch:7.6.2
    restart: always
    container_name: elasticsearch
    ports:
      - 9200:9200
    environment:
      discovery.type: single-node

  # kibana图形化插件
  kibana:
    image:  daocloud.io/library/kibana:7.6.2
    restart: always
    environment:
      SERVER_NAME: kibana
      ELASTICSEARCH_URL: http://192.168.8.4:9200
    ports:
      - 5601:5601
    depends_on:
      -  elasticsearch
1
2
3
4
5
6
7
8
9
10
11
12
13
14
15
16
17
18
19
20
21
22
2
3
4
5
6
7
8
9
10
11
12
13
14
15
16
17
18
19
20
21
22
启动docker-compose up -d,测试(这里切换到我阿里云的学生机器)
shell
curl http://120.26.114.23:9200
## 输出
{
  "name" : "82877e7f04ad",
  "cluster_name" : "docker-cluster",
  "cluster_uuid" : "x-bP78brST-9y8kpLUtrxw",
  "version" : {
    "number" : "7.6.2",
    "build_flavor" : "default",
    "build_type" : "docker",
    "build_hash" : "ef48eb35cf30adf4db14086e8aabd07ef6fb113f",
    "build_date" : "2020-03-26T06:34:37.794943Z",
    "build_snapshot" : false,
    "lucene_version" : "8.4.0",
    "minimum_wire_compatibility_version" : "6.8.0",
    "minimum_index_compatibility_version" : "6.0.0-beta1"
  },
  "tagline" : "You Know, for Search"
}
1
2
3
4
5
6
7
8
9
10
11
12
13
14
15
16
17
18
19
2
3
4
5
6
7
8
9
10
11
12
13
14
15
16
17
18
19
浏览器访问5601端口
Elastic Search api简介
上面说了ES是使用了RESTFul Web接口,也就是说我们可以通过http请求的方式来查询修改删除我们的数据。
| method | url地址 | 描述 | 补充 |
|---|---|---|---|
| PUT | :9200/索引名称/类型名称/文档ID | 创建文档(指定文档) | |
| POST | :9200/索引名称/类型名称 | 创建文档随机ID | 最好将唯一ID写入文档ID |
| POST | :9200/索引名称/类型名称/文档ID/_update | 修改文档 | 常用更新 |
| DELETE | :9200/索引名称/类型名称/文档ID | 删除文档 | |
| GET | :9200/索引名称/类型名称/文档ID | 查询文档 | 指定ID |
| POST | :9200/索引名称/类型名称/_search | 查询对应数据 | 模糊查询 |
api使用
我们既然安装了kibana就使用它的图像界面去请求对应的api。
点击Dev Tools就是我们写api的地方
获取ES基本信息
bash
GET /
# 输出
{
  "name" : "82877e7f04ad",
  "cluster_name" : "docker-cluster",
  "cluster_uuid" : "x-bP78brST-9y8kpLUtrxw",
  "version" : {
    "number" : "7.6.2",
    "build_flavor" : "default",
    "build_type" : "docker",
    "build_hash" : "ef48eb35cf30adf4db14086e8aabd07ef6fb113f",
    "build_date" : "2020-03-26T06:34:37.794943Z",
    "build_snapshot" : false,
    "lucene_version" : "8.4.0",
    "minimum_wire_compatibility_version" : "6.8.0",
    "minimum_index_compatibility_version" : "6.0.0-beta1"
  },
  "tagline" : "You Know, for Search"
}
1
2
3
4
5
6
7
8
9
10
11
12
13
14
15
16
17
18
19
2
3
4
5
6
7
8
9
10
11
12
13
14
15
16
17
18
19
创建索引 -- 仅解构
shell
PUT /test2
{
	"mappings": {
		"properties": {
			"name": {
				"type": "text"
			},
			"age": {
				"type": "long"
			},
			"birthday": {
				"type": "date"
			}
		}
	}
}
## 输出
{
  "acknowledged" : true,
  "shards_acknowledged" : true,
  "index" : "test2"
}
1
2
3
4
5
6
7
8
9
10
11
12
13
14
15
16
17
18
19
20
21
22
2
3
4
5
6
7
8
9
10
11
12
13
14
15
16
17
18
19
20
21
22
获取索引解构信息
shell
GET /test2
## 输出
{
  "test2" : {
    "aliases" : { },
    "mappings" : {
      "properties" : {
        "age" : {
          "type" : "long"
        },
        "birthday" : {
          "type" : "date"
        },
        "name" : {
          "type" : "text"
        }
      }
    },
    "settings" : {
      "index" : {
        "creation_date" : "1594478433505",
        "number_of_shards" : "1",
        "number_of_replicas" : "1",
        "uuid" : "ZcECl47_SPWdWSh-xifv5w",
        "version" : {
          "created" : "7060299"
        },
        "provided_name" : "test2"
      }
    }
  }
}
1
2
3
4
5
6
7
8
9
10
11
12
13
14
15
16
17
18
19
20
21
22
23
24
25
26
27
28
29
30
31
32
2
3
4
5
6
7
8
9
10
11
12
13
14
15
16
17
18
19
20
21
22
23
24
25
26
27
28
29
30
31
32
创建文档 -- 指定文档Id ,_doc表示默认类型(后续ES会在某个版本舍弃)
shell
PUT /test2/_doc/1
{
  "name":"laoshiren",
  "age":1,
  "birthday":"2020-07-10"
}
## 输出
{
  "_index" : "test2",
  "_type" : "_doc",
  "_id" : "1",
  "_version" : 1,
  "result" : "created",
  "_shards" : {
    "total" : 2,
    "successful" : 1,
    "failed" : 0
  },
  "_seq_no" : 0,
  "_primary_term" : 1
}
1
2
3
4
5
6
7
8
9
10
11
12
13
14
15
16
17
18
19
20
21
2
3
4
5
6
7
8
9
10
11
12
13
14
15
16
17
18
19
20
21
获取指定文档
shell
GET /test2/_doc/1
## 输出
{
  "_index" : "test2",
  "_type" : "_doc",
  "_id" : "1",
  "_version" : 1,
  "_seq_no" : 0,
  "_primary_term" : 1,
  "found" : true,
  "_source" : {
    "name" : "laoshiren",
    "age" : 1,
    "birthday" : "2020-07-10"
  }
}
1
2
3
4
5
6
7
8
9
10
11
12
13
14
15
16
2
3
4
5
6
7
8
9
10
11
12
13
14
15
16
修改文档(部分属性更新)_update必须跟上,不然属性会有属性为null,现在已经更新语法
POST /{index}/_update/{id},_version表示我们更新的版本。
shell
POST /test2/_doc/1/_update
{
	"doc": {
		"name": "Kakarotto"
	}
}
## 输出
{
  "_index" : "test2",
  "_type" : "_doc",
  "_id" : "1",
  "_version" : 2,
  "result" : "noop",
  "_shards" : {
    "total" : 0,
    "successful" : 0,
    "failed" : 0
  },
  "_seq_no" : 2,
  "_primary_term" : 1
}
1
2
3
4
5
6
7
8
9
10
11
12
13
14
15
16
17
18
19
20
21
2
3
4
5
6
7
8
9
10
11
12
13
14
15
16
17
18
19
20
21
删除文档,必须指定Id,再次获取就会返回found: false
shell
DELETE /test2/_doc/2
## 输出
{
  "_index" : "test2",
  "_type" : "_doc",
  "_id" : "2",
  "_version" : 2,
  "result" : "deleted",
  "_shards" : {
    "total" : 2,
    "successful" : 1,
    "failed" : 0
  },
  "_seq_no" : 3,
  "_primary_term" : 1
}
1
2
3
4
5
6
7
8
9
10
11
12
13
14
15
16
2
3
4
5
6
7
8
9
10
11
12
13
14
15
16
简单查询 _score表示文档对应查询条件的匹配程度
shell
GET /test2/_doc/_search
{
	"query": {
		"match": {
			"name": "laoshiren"
		}
	}
}
## 输出
{
  "took" : 849,
  "timed_out" : false,
  "_shards" : {
    "total" : 1,
    "successful" : 1,
    "skipped" : 0,
    "failed" : 0
  },
  "hits" : {
    "total" : {
      "value" : 2,
      "relation" : "eq"
    },
    "max_score" : 0.8713851,
    "hits" : [
      {
        "_index" : "test2",
        "_type" : "_doc",
        "_id" : "2",
        "_score" : 0.8713851,
        "_source" : {
          "name" : "laoshiren",
          "age" : 1,
          "birthday" : "2020-07-10"
        }
      },
      {
        "_index" : "test2",
        "_type" : "_doc",
        "_id" : "4",
        "_score" : 0.429556,
        "_source" : {
          "name" : "laoshiren is a good boy",
          "age" : 1,
          "birthday" : "2020-07-10"
        }
      }
    ]
  }
}
1
2
3
4
5
6
7
8
9
10
11
12
13
14
15
16
17
18
19
20
21
22
23
24
25
26
27
28
29
30
31
32
33
34
35
36
37
38
39
40
41
42
43
44
45
46
47
48
49
50
2
3
4
5
6
7
8
9
10
11
12
13
14
15
16
17
18
19
20
21
22
23
24
25
26
27
28
29
30
31
32
33
34
35
36
37
38
39
40
41
42
43
44
45
46
47
48
49
50
限制查询字段
shell
{
	"query": {
		"match": {
			"name": "laoshiren"
		}
	},
	"_source":[ "name","birthday" ]
}
1
2
3
4
5
6
7
8
2
3
4
5
6
7
8
分页查询
shell
{
	"query": {
		"match": {
			"name": "laoshiren"
		}
	},
	"from": 0,
	"size": 2
}
1
2
3
4
5
6
7
8
9
2
3
4
5
6
7
8
9
更多api操作可以看下其他人的文档,这里只举了常用的。
先说一下为什么我们公司要使用ES,因为我们公司有一个表大概在20W+,我们希望能够快速的查找相似数据,进行对比。MySQL虽然能使用like进行查找,但是分词等技术还得想办法解决。于是我们本来是打算使用MySQL+Drools,进行查询使用规则引擎给每一个查询结果进行打分去实现(不过我一直觉得加上Drools好像没什么意义)。
然后经过一段时间的讨论,最终决定还是使用ES去 实现这种查找,20W 虽然不多,但相对于MySQL的模糊查找来说,ES显得更加合适。
SpringBoot
首先创建一个springboot项目,查看一下我们的版本,因为我们公司的小伙伴使用的是2.1.8.RELEASE,所以我得和他们保持统一。 点开parent 项目 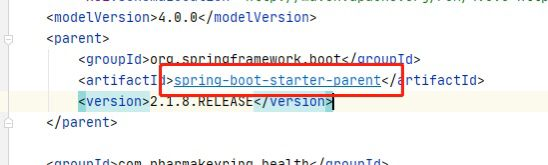 然后点开
然后点开spring-boot-start-parent的parent项目(葫芦娃找爷爷) 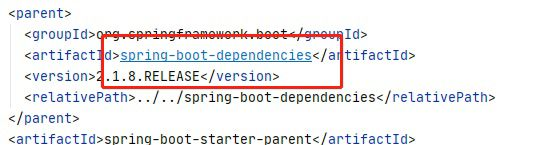 最后我们查找一下
elasticsearch的依赖  到时候得手动修改他的版本号,因为我们装的
ES是7.6.2的版本。
我们只需要在自己的项目里的<properties></properties>加上和他一样的标签就行。
xml
<properties>
    <!-- springboot 2.1.8.RELEASE 默认是6.4.3 手动修改版本-->
	<elasticsearch.version>7.6.2</elasticsearch.version>
</properties>
<dependencies>
	<!-- springboot start  -->
    <dependency>
        <groupId>org.springframework.boot</groupId>
        <artifactId>spring-boot-starter-data-elasticsearch</artifactId>
    </dependency>

    <dependency>
        <groupId>org.elasticsearch.client</groupId>
        <artifactId>elasticsearch-rest-high-level-client</artifactId>
    </dependency>
</dependencies>
1
2
3
4
5
6
7
8
9
10
11
12
13
14
15
16
2
3
4
5
6
7
8
9
10
11
12
13
14
15
16
这样我们的版本就被替换成正确的了  接下来就是配置
springboot,这里只贴关键代码 首先得配置es search的配置类,
java
package com.laoshiren.hello.elasticsearch.provider.configure;

import org.apache.http.HttpHost;
import org.elasticsearch.client.RestClient;
import org.elasticsearch.client.RestHighLevelClient;
import org.springframework.beans.factory.annotation.Value;
import org.springframework.context.annotation.Bean;
import org.springframework.context.annotation.Configuration;

/**
 * ProjectName:     hello-elasticsearch
 * Package:         com.laoshiren.hello.elasticsearch.provider.configure
 * ClassName:       ElasticSearchClientConfiguration
 * Author:          laoshiren
 * Date:            2020/7/9 16:21
 * Version:         1.0.0
 */
@Configuration
public class ElasticSearchClientConfiguration {

    @Value("${laoshiren.elastic.hostname}")
    private String hostname;
    @Value("${laoshiren.elastic.port}")
    private int port;
    @Value("${laoshiren.elastic.scheme}")
    private String scheme;

    @Bean
    public RestHighLevelClient restHighLevelClient(){
        return new RestHighLevelClient(
                RestClient.builder(
                        new HttpHost(hostname, port, scheme)));
    }

}
1
2
3
4
5
6
7
8
9
10
11
12
13
14
15
16
17
18
19
20
21
22
23
24
25
26
27
28
29
30
31
32
33
34
35
2
3
4
5
6
7
8
9
10
11
12
13
14
15
16
17
18
19
20
21
22
23
24
25
26
27
28
29
30
31
32
33
34
35
包名叫configure吧,类名应该叫XXXConfiguration吧,配置就配置了一个RestHighLeveClient,就相当于有了xxxTemplate的感觉,我们拿这个东西去访问我们的ES,这里需要3个参数scheme,hostname,port,分别是协议,地址,端口。写在配置文件里。
yaml
laoshiren:
  elastic:
    hostname: 120.79.0.210
    port: 9200
    scheme: http
1
2
3
4
5
2
3
4
5
然后去测试类获取Client去写一个空方法调用吧(TDD编程嘛)
java
@SpringBootTest
@RunWith(SpringRunner.class)
public class ESClient {

    @Test
    public void runEmpty(){

    }

    @Resource
    private RestHighLevelClient client;
    @Resource
    private ObjectMapper objectMapper;

    @Test
    public void initClient(){
        System.out.println(client);
    }
}
1
2
3
4
5
6
7
8
9
10
11
12
13
14
15
16
17
18
19
2
3
4
5
6
7
8
9
10
11
12
13
14
15
16
17
18
19
等这2个方法都不报错,我们就可以继续学习了。
API
希望大家可以使用debug的方式查看每次请求完成后的response 创建索引
java
@Test
public void createIndex() throws IOException {
    // 索引请求
    CreateIndexRequest request = new CreateIndexRequest("organization");
    // 执行
    CreateIndexResponse response = client.indices()
            .create(request, RequestOptions.DEFAULT);
    System.out.println(response.index());
}
1
2
3
4
5
6
7
8
9
2
3
4
5
6
7
8
9
判断索引存不存在
java
@Test
public void existsIndex() throws IOException {
    GetIndexRequest request = new GetIndexRequest("organization");
    boolean exists = client.indices()
            .exists(request, RequestOptions.DEFAULT);
    System.out.println(exists);
}
1
2
3
4
5
6
7
2
3
4
5
6
7
删除索引
java
@Test
public void deleteIndex() throws IOException{
    DeleteIndexRequest request = new DeleteIndexRequest("tb_user");
    AcknowledgedResponse delete = client.indices()
            .delete(request, RequestOptions.DEFAULT);
    System.out.println(delete.isAcknowledged());
}
1
2
3
4
5
6
7
2
3
4
5
6
7
创建文档
java
@Test
public void createDoc() throws Exception {
    TbUser tbUser = new TbUser();
    tbUser.setCustomerNo("0001")
            .setGrpContNo("2020")
            .setFirstName("laoshiren1207")
            .setTransAmt(900)
            .setCreateDate(new Date());
    // 指定索引
    IndexRequest request = new IndexRequest("tb_user");
    // 设置规则
    request.id("1")
            .timeout(TimeValue.timeValueSeconds(5));
    // 对象转换json
    request.source(objectMapper.writeValueAsString(tbUser), XContentType.JSON);
    // 发送请求
    IndexResponse index = client.index(request, RequestOptions.DEFAULT);
    System.out.println(index.toString());
    // 命令返回的状态
    System.out.println(index.status());
}
1
2
3
4
5
6
7
8
9
10
11
12
13
14
15
16
17
18
19
20
21
2
3
4
5
6
7
8
9
10
11
12
13
14
15
16
17
18
19
20
21
文档存不存在
java
@Test
public void existsDoc()throws Exception{
    GetRequest request = new GetRequest("tb_user","1");
    boolean exists = client.exists(request, RequestOptions.DEFAULT);
    System.out.println(exists);
}
1
2
3
4
5
6
2
3
4
5
6
获取文档
java
@Test
public void getDoc() throws Exception{
    GetRequest request = new GetRequest("tb_user","1");
    GetResponse response = client.get(request, RequestOptions.DEFAULT);
    // 所有信息
    System.out.println(response.toString());
    // 获取doc
    System.out.println(response.getSourceAsString());
}
1
2
3
4
5
6
7
8
9
2
3
4
5
6
7
8
9
更新文档
java
@Test
public void postDocForUpdate() throws Exception {
    UpdateRequest request = new UpdateRequest("tb_user","1");
    request.timeout(TimeValue.timeValueSeconds(5));
    // 新对象
    TbUser tbUser = new TbUser();
    // 202007111030
    tbUser.setCreateDate(new Date());
    // 文档类型 XContentType
    request.doc(objectMapper.writeValueAsString(tbUser),XContentType.JSON);
    UpdateResponse update = client.update(request, RequestOptions.DEFAULT);
    System.out.println(update.status());
}
1
2
3
4
5
6
7
8
9
10
11
12
13
2
3
4
5
6
7
8
9
10
11
12
13
删除文档
java
@Test
public void deleteDoc() throws Exception{
    DeleteRequest request = new DeleteRequest("tb_user","1");
    request.timeout(TimeValue.timeValueSeconds(5));
    DeleteResponse delete = client.delete(request,RequestOptions.DEFAULT);
    System.out.println(delete.status());
}
1
2
3
4
5
6
7
2
3
4
5
6
7
批量insert操作
java
@Test
public void bulkInsert()throws Exception{
    BulkRequest bulkRequest = new BulkRequest();
    // 批量操作
    bulkRequest.timeout(TimeValue.timeValueSeconds(30));
    List<TbUser> list = new ArrayList<>();
    TbUser tbUser =new TbUser();
    tbUser.setCreateDate(new Date())
            .setTransAmt(23)
            .setFirstName("laoshiren")
            .setGrpContNo("00001")
            .setCustomerNo("00003");
    list.add(tbUser);
    TbUser tbUser2 =new TbUser();
    tbUser2.setCreateDate(new Date())
            .setTransAmt(23)
            .setFirstName("周杰伦")
            .setGrpContNo("00001")
            .setCustomerNo("00003");
    list.add(tbUser2);
    // 获取索引
    for (int i = 0; i< list.size(); i++) {
        //批处理请求
        IndexRequest index = new IndexRequest("tb_user")
                .id("" + (i + 2))
                // 转换json string
                .source(objectMapper.writeValueAsString(list.get(i)), XContentType.JSON);
        bulkRequest.add(index);
    }
    BulkResponse bulk = client.bulk(bulkRequest, RequestOptions.DEFAULT);
    System.out.println(bulk.status());
    System.out.println(bulk.hasFailures());
}
1
2
3
4
5
6
7
8
9
10
11
12
13
14
15
16
17
18
19
20
21
22
23
24
25
26
27
28
29
30
31
32
33
2
3
4
5
6
7
8
9
10
11
12
13
14
15
16
17
18
19
20
21
22
23
24
25
26
27
28
29
30
31
32
33
搜索
java
@Test
public void search() throws Exception{
    SearchRequest request = new SearchRequest("tb_user");
    // 构造
    SearchSourceBuilder builder = new SearchSourceBuilder();
    // 中文或者自定义字符串就要加上 field.keyword
    MatchQueryBuilder query= QueryBuilders.MatchQuery("firstName", "a");
    // 构建所需查询
    builder.query(query);
    builder.from(0);
    builder.size(5);
    builder.timeout(new TimeValue(60,TimeUnit.SECONDS));
    request.source(builder);
    SearchResponse search = client.search(request, RequestOptions.DEFAULT);
    System.out.println(search.toString());
    // 所需数据
    System.out.println(search.getHits());
    for (SearchHit hit : search.getHits().getHits()) {
        String s = objectMapper.writeValueAsString(hit);
        System.out.println(s);
    }
}
1
2
3
4
5
6
7
8
9
10
11
12
13
14
15
16
17
18
19
20
21
22
2
3
4
5
6
7
8
9
10
11
12
13
14
15
16
17
18
19
20
21
22
搜索不仅仅只有这一个他的QueryBuilders提供了大量的条件查询比如boolQuery,termQuery等。像我在工作中我就会用MatchQuery
java
BoolQueryBuilder boolQuery = QueryBuilders.boolQuery();
map.keySet().forEach(it -> {
    if (!StringUtils.isBlank(map.get(it).toString())) {
        boolQuery.must(
                QueryBuilders.matchQuery(it, map.get(it).toString())
                        // 指定分词
                        .analyzer(analyzer));
    }
});
1
2
3
4
5
6
7
8
9
2
3
4
5
6
7
8
9
更多的API可以参考其他的博主或者B站的一些up主,比如三太子敖丙,狂神说,lusifer(撸帝)还有什么很多的培训机构的一些文章视频都可以看看,一些新技术他们肯定会知道了解。 熟读唐诗三百首,不会吟诗也会吟嘛
Bug
bash
java.io.IOException: 远程主机强迫关闭了一个现有的连接。
	at org.elasticsearch.client.RestClient.extractAndWrapCause(RestClient.java:828) ~[elasticsearch-rest-client-7.6.2.jar:7.6.2]
1
2
2
最近两天在准备测试,发现这个client长时间连接不使用会报异常,第一次请求报错,再一次请求就恢复正常了。所以修改了一下代码
java
 @Bean(name = "restSearchClient")
public RestHighLevelClient restHighLevelClient(){
    return new RestHighLevelClient(
            RestClient.builder(new HttpHost(host,port,scheme))
                    .setRequestConfigCallback(requestConfigBuilder -> {
                        requestConfigBuilder.setConnectTimeout(-1);
                        requestConfigBuilder.setSocketTimeout(30000);
                        requestConfigBuilder.setConnectionRequestTimeout(30000);
                        return requestConfigBuilder;
                    })
    );
}
1
2
3
4
5
6
7
8
9
10
11
12
2
3
4
5
6
7
8
9
10
11
12
隔了一晚,发现加上了好像也没什么用处,所以我就打算既然连接会死,那就每个一段时间请求一下ES服务器的的信息,即使死了,那再下次一请求这个客户端一定是可以。
java
@Scheduled(cron = "0 0 * * * ? ")
public void restClientKeepAlive() {
    try {
        log.info("schedule 保持ES客户端存活 start");
        MainResponse response = restClient.info(RequestOptions.DEFAULT);
        log.info("schedule 保持ES客户端存活 end");
    } catch (IOException ignore) {}
}
1
2
3
4
5
6
7
8
2
3
4
5
6
7
8
不知道有没有大佬还有其他的解决方法没有,可以指点一下,
文档来源
【狂神说Java】ElasticSearch7.6.x最新完整教程通俗易懂 - 遇见狂神说
特别推荐狂神说的视频简单清晰易懂而且免费。